Kitchen Cabinet Parts Terminology

Kitchen Cabinet Parts Terminology

If you are searching for “parts of a cabinet” or “kitchen cabinet parts terminology” and what words like Inset, frameless, overlay, stiles and rails mean? If so, DC Drawers can help!

Kitchen Cabinet Parts Terminology & What They Mean

We work directly in conjunction with cabinet door manufacturers and have had the experience of learning a little more about cabinet parts and terminology used in the industry.

Kitchen-Cabinet-Parts-Diagram

Rail:

Cabinet Rail

The piece of the cabinet’s frame structure located at the top and bottom of the door.

Stile:

Cabinet Stile

The piece of the cabinet’s frame structure located on the left and right of the door.

Framing Bead:

The part of the cabinet door that is cut in front.

Framing Edge:

The part of the door that has a decorative design in the edges of the door.

Drawer Box

Drawer Boxes

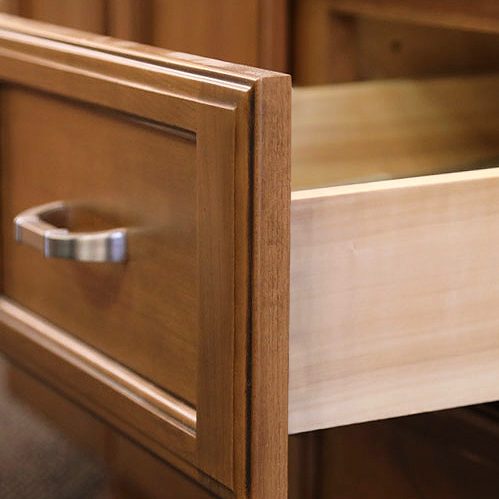
The drawer box is one of the main components of any kitchen cabinet. The drawer in a kitchen cabinet is used more often than the cabinet doors themselves. You can easily replace drawer boxes by purchasing them online or at a local cabinet shop.

Cabinet Face Frame

The cabinet face frame is the front of the cabinet behind the door and drawer. It is typically make using solid wood but cheap cabinetry often uses staples for attaching the face frame.

Cabinet Door Hinges

Cabinet Hinges

Cabinet door hinges are also a very important part of a cabinet. They hold the cabinet door up and are opened and closed thousands of times throughout their lifetime. It is always wise to buy high quality hinges due to the rigorous wear they go through. You can find replacement cabinet hinges at homedepot.com and places like that online.

Cabinet Doors & Drawer Fronts

Cabinet-Door

Drawer-Front

The cabinet door you choose is important because these will be the first thing you see when you walk into your kitchen. However, you can easily buy replacement cabinet doors and drawer fronts online or at your local cabinetry shop.

Shelves

Strength should be your primary focus when it comes to cabinet shelves. Your shelves hold weight for long periods of time and should be built out of quality hard wood for the highest durability. Some choose to go with cabinet organizers or slide out shelves for easier access.

Drawer Slides

Drawer slides need to be high quality due to the rigorous wear and tear they go through when being opened and closed thousands of times throughout the years. Consumers can choose either traditional drawer slides or drawers with power outlet options called drawer outlet kits.

Panel Raise Profile:

Raised-Panel-Cabinets

The part of the frame’s door that is given a cut on the raised panel, enhancing the fact that the panel is separated from the frame itself. This panel may also be flat. When the panel has been raised it will resemble the pictures of the door above. It shows that where the frame and panel come together, the panel has been elevated, and stands out from the frame. A flat panel however, is like it sounds, flat, and straight across.

Frame or Frameless:

Frameless Cabinet Doors

The cabinet’s frame can be either way, framed or frameless. Making the cabinet frameless will make it have more accessibility, ‘All access’. This type of structure is constructed without a face frame, having a thicker box structure, making it more stable.

It is significant that you know what the difference between a full and a partial overlay is in cabinets, and also, what inset cabinets are. On a full overlay cabinet or drawers, the doors or drawers will cover the face frame completely. With a partial overlay, the cabinets are going to show some of the frame still. An inset feature of a cabinet is where the doors and /or drawers fit inside (behind) the face frame opening of the cabinet.

Understanding The Different Parts Of A Cabinet

By understanding what the different parts of cabinets, as well as your drawer box choices and the types of door framing you can choose from, will will help extremely in deciding the way you are going to want your kitchen and /or bathroom appearance to be.

Knowing all of this a head of time can bring greater end results! After all, the process of cabinet making is not as confusing or befuddling as some may think. Of course, if you are a cabinet professional, you will most certainly want to learn as much about it as you can, and hopefully, this article has provided you with a little bit of knowledge into the world of making cabinets. I know I have learned a lot that I did not know before from it.

Thank you for reading “Kitchen Cabinet Parts Terminology“! Stay tuned for more from the expert drawer box manufacturers at DCDrawers.com

Dovetail Drawer Advantages

If you’re searching for the advantages of dovetail joints when considering which type of drawer boxes to purchase, this post should help.  Dovetail Drawers are a common concept in the professional bath and kitchen cabinetry industry. But not one that all homeowners are familiar with.  What a dovetail joint is usually only comes up when deciding which type is best for their bathroom or kitchen.

Dovetail Drawers have long been the standard in premium cabinet making. Despite the appeal and popularity, not many people are sure of what they exactly are.  Let us explain further what a dovetail joint is and why they are the premium drawer box option.

What Are Dovetail Drawers?


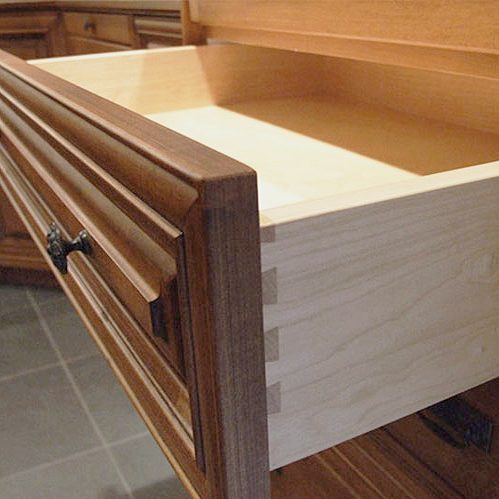
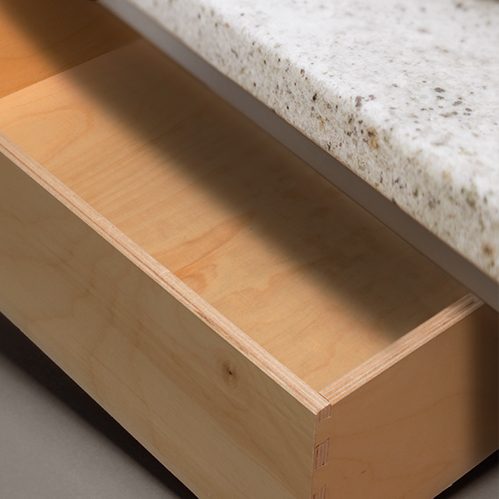
The term “Dovetail Drawer” pertains to a particular design structure of the drawer, where the drawer compartment is made of solid wood and a dovetail joint secures the sides of the drawer with its front. This distinctive joint that resembles pieces from a jigsaw puzzle perpendicularly joined together at the drawers outside corners makes dovetail drawers easily recognizable.

There are several benefits to designing a drawer to have this structure, some of which we’ll outline further in the article.

Considered a premium drawer option among homeowners, dovetail drawers differ from regular drawers in how they’re constructed and the kind of joint they use is exclusive to dovetail drawers. Some drawer manufacturers even use Dovetail Joints on pull out shelves. This particular joint is called a locking joint, and comprises of wedge-shaped cuts at the end of the wooden frame that fit into each other from each side, forming a box. These cuts, or pins and tails as they’re called, form an incredibly strong and resistant box when they fit into each other. The joint is so strong, in fact, that even when the drawer breaks, it rarely breaks from the area of the joint.

Back to top

Large Surface Area


It’s not just the mechanics of the locking joint that make it so durable, but also the large surface area it provides to apply glue on, and this increased amount of glue between the joints enhances the drawer’s durability and strength.

Back to top

Dovetail Drawer Design


The design of the joint also allows for increased storage space, and even more so in English dovetails, which are the ones that attract most popularity and easily become a part of all kinds of furniture. French dovetail drawers lean towards the specialty and luxury furniture market with pieces that have curved fronts, and joints on the drawer sides shaped such that they slide upwards and fit in a trench shaped opening running through the front piece.

English Dovetail

The English Dovetail is one where you can see the ends of the adjoining pieces at the corners of the drawers.  This is the premium type of dovetail joint design as it is the tightest and longest lasting joint.  The English Dovetail makes the joint at the very edge of the wood, which means you get the most space inside the drawer.  In the finest drawers and furniture you will find the English Dovetail as it’s simply stronger and better looking.

French Dovetail

The French Dovetail differs greatly from the English Dovetail. Instead of having numerous “fingers” that joint to create an incredibly strong corner the French dovetail is 1 channel cut in board A and board B is shaped to fit in that channel.  This design is simply inferior as it hinges the durability of the drawer on thin edges of wood inside the channel.  French dovetail joints also must be made a distance in from the corner of the wood, which means the drawers are more narrow or not as deep.

Sliding Dovetail

Believe it or not all dovetail joints are sliding dovetail joints.  Dovetail joints are by nature and definition those where two pieces of wood are machined to have corresponding sections that slide together.  So all dovetail drawers are sliding dovetail joints.  With that said a lot of consumers call the French Dovetail a “sliding joint” as it does slide together further.

Back to top

Dovetail Drawer Joints


As mentioned earlier, the way the joints are constructed is what makes dovetail drawers unique, and this is also what brings its advantages. These locking joints enable the drawer to be stronger and sturdier, at the same time offering a larger storage space.Although often seen as a standard for good quality drawers, this isn’t always the case. With a variety of different drawer constructions, you should assess the drawers’ sturdiness and storage capacity when on the lookout for the right drawers for your cabinets.

Back to top

Dovetail Advantages Over Other Drawers


Dovetail drawers take the lead against ordinary drawers as the locking joints ensure that the drawer sides and front are securely held together, forming a durable bond that easily withstands minor wear and damage. Not all wooden drawers are made of solid wood, with your average drawer comprising of particleboard planks stapled together, but dovetail drawers are, which becomes an immediate advantage as people can be confident while making a purchase that the drawers are a hundred percent wood.This wood goes through a sanding, buffing and finishing process before it is cut with precision to fit in the locking joint. This results in an end product that is sturdy and durable but also stunning to look at, and a trademark of pure craftsmanship.

While dovetail drawers remain the standard for hundreds of years, the industrial revolution and modern advancements gave way to much faster and cheaper mass production of particleboard drawers with pieces stapled together by industrial machines. What came out of this was certainly an economical product, but one which lacked the durability, the refinement and the uniqueness of the dovetail drawer.

Back to top

Biggest Advantages Of Dovetail Drawers

There are 3 key advantages to quality dovetail joints when constructing drawers or furniture.  These advantages are primarily about the English Dovetail Joint, as it is the standard for the highest quality and most durable woodwork.


1. Sturdiness: 

As the sides of the drawer seamlessly fit into the front, this creates a strong bond that glued or stapled drawers can’t match. The use of solid wood rather than thin and less sturdy particle boards in making drawer boxes also enhances the durability and strength of the drawer.The perfect integration of solid wood and a locking joint in the drawer makes for a premium drawer that ordinary drawers can’t compare to.

2. Durability: 

As mentioned above, the solid wood and the locking joint enhance the drawer’s durability and make for a drawer that could easily last a lifetime. Whereas regular drawers have drawer glides on each side, open to wear and tear, dovetail drawers feature glides underneath the drawer box. Since they are the only part of the drawer that takes the brunt of the work and consequential wear, the best place for them is underneath the drawer, which is exactly where the dovetail drawer puts them.

3. Craftsmanship:

Due to the amount of detail, precision, and craftsmanship that goes into the production of a dovetail, they have a premium feel to them that is still considered a standard in luxury cabinet making. Those with a refined taste will appreciate the drawers’ seamless construction and how smoothly it slides in and out of the cabinet.To ensure a premium drawer that looks stunning and works without a flaw, dovetail drawers need to be crafted with utmost precision, focus and above all, patience; all of which makes way for a product superior than most its counterparts.

Back to top

Conclusion


Although there are many consideration and features that factor in on how long your cabinet fixtures are going to last, an important one is dovetail drawers. Their quality and durability is rarely matched, and they are sure to enhance the performance and the lifespan of your cabinetry.

More About DC Drawers (Drawer Connection)

At Drawer Connection, our philosophy is to “give customers the drawer quality they deserve at a price they can afford.” And we have been doing just that since 1997. We provide our customers with the highest quality materials, craftsmanship and customer service. Our dedication to exceeding your expectations ensures that you will receive a high-quality product, complete to your specifications, and on time.

At Drawer Connection, our philosophy is to “give customers the drawer quality they deserve at a price they can afford.” And we have been doing just that since 1997. We provide our customers with the highest quality materials, craftsmanship and customer service. Our dedication to exceeding your expectations ensures that you will receive a high-quality product, complete to your specifications, and on time. Give us a call today for more information about dovetail drawers 1 (877) 917-4887. Stay tuned for more from the expert drawer box manufacturers at DCDrawers.com

What Is Melamine Wood?

If you’re searching “what is melamine wood?” or “is melamine waterproof?” you might be looking for new cabinets or melamine cabinet drawers, or you may be looking at plates, flooring, or even dry erase boards.  Melamine is a laminate product that is a common hard resin overlay which is heat applied to plywood or MDF.  It is a highly durable thermosetting plastic which starts as an organic compound which is combined with formaldehyde.

Laminate vs. Melamine

Melamine is type of laminate, yet not all laminates are made from melamine. A laminate is the description of a product where a layer, or laminate, is applied over a substrate such as plywood or MDF.  Melamine laminates are constructed by molding a formaldehyde/melamine combination into a sheet of durable plastic.  Melamine is fabricated through a process of applying a pressure of about 300 to 500 lbs per square inch.  This pressure makes melamine a lower pressure laminate, or LPL.  Formica is another type of laminate which is formed using much higher pressure, a whopping 1,400 lbs per square inch.

Melamine Benefits For Building

Melamine when installed correctly is a long lasting, inexpensive, and durable option.  While melamine is waterproof if it is installed poorly water may get into the inner wood, causing the melamine to warp.  The durability of melamine makes it a favorite, but if installed poorly there is a chance of it chipping.

  • Wide Selection – Melamine is produced in an incredibly wide variety of finishes and colors.
  • Great Durability – Melamine is waterproof, shatter and scratch resistant.
  • Easy On Budget – Melamine covers less expensive wood products like MDF or plywood.

What Is Made From Melamine?

Melamine is widely used product in a number of industries.  It is used in kitchen cabinetry, display counters, office furniture, dry erase boards, and even flatware like dishes and bowls.  Melamine has become a popular building material as it gives otherwise lower quality materials an attractive and durable finish.  While most of us would prefer solid wood cabinetry Melamine offers a much more budget friendly option which is lightweight, convenient, and a cost effective decision.

How Melamine Is Made

A special type of craft paper which does not get soggy or tear even when it is saturated is soaked in a resin called phenol.  The resin absorbs into the paper and then goes into a drying oven to cure.  The paper is then winded into a roll.  At this point solid color or decorative layer melamine is separated into two process lines.  Solid color melamine is then coated with additional resin while melamine which will have printed designs is combined with an overlay of melamine.

Under Pressure & Heat

Once these products are ready they are sent to a press.  As the laminate sections are laid in the press a metal sheet is set between them to prevent the layers from sticking to each other. Under high heat and pressure the sheets of decorative laminate and the saturated melamine craft paper are made into laminated sheets of melamine.  The metal sheets that are set in as the layers are stacked before pressing may contain designs of wood grain or stone texturing.  After the press the laminate layers are completely cured.  The finishing line trims and sands the sheets to ensure proper adhesion when combined with the MDF or plywood substrates.

Compound laminates are made from stacking thick sections of black laminate along with craft paper and 2 decorative layers. Compound laminates are so thick that they are used without the addition of plywood or MDF to provide structural support.

Melamine Cabinet Drawers

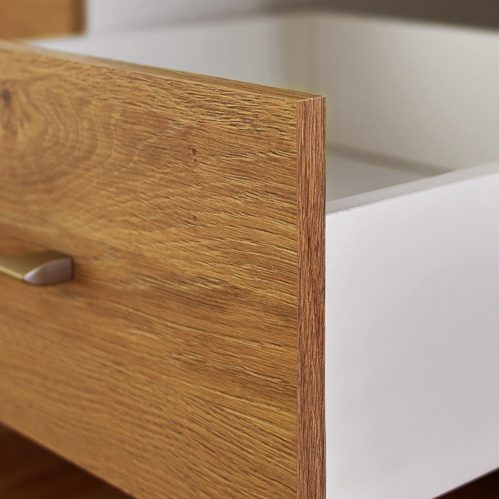
If you are a homeowner or cabinetry company looking for melamine cabinet drawers, Drawer Connection is here to help!  We off affordable melamine cabinet drawers, high quality, and fast turnarounds.  Let our shop take care of the drawer boxes while you focus on the rest of the cabinetry and doing installs.  Homeowners are also welcome to place orders for replacement melamine cabinet drawers.

Shop: Melamine Dovetail Cabinet Drawers

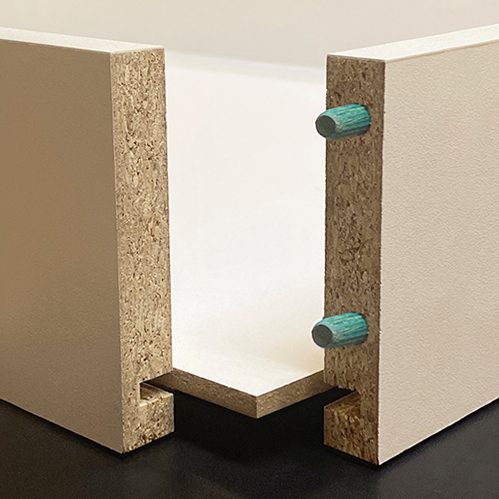
Shop: Melamine Dowel Cabinet Drawers

How To Build A Drawer Box

Are you looking for information on “How To Build A Drawer Box” or how to “Build Your Own Drawers“? Well, we put together a pretty solid guide that should show you step by step how to build your own drawer box at home.

With many DIYer’s, the terms “drawer dados” or “drawer dovetails” is enough to end them running off. However, there are simpler ways to create a drawer without the use of a router or table saw, while still ending with a beautiful and sturdy product. Are you stressed over fasteners being visible? Our design hides them in a clever way so they are not visible, giving a sturdy appearance. Keep reading to learn how you can build a drawer of any size quickly, and simply.

Required Time: 1 hour 30 Minutes

Difficulty Level: Pocket hole joinery and square cuts make this project easy and comfortable for beginners.

Step-by-Step Instructions

Follow these step by step instructions for how to build a drawer box.  Tools will be required for some steps such as saws, drills, and other hand tools.

  1. Cutting parts

By using the cut list and a miter saw, cut the 1×3, 1×6 and square dowels to the correct size. Mark the cut lines on the plywood’s face with a framing square. Position painter’s tape on the cut lines, if necessary mark again. By using painter’s tape, it helps prevent splintering plywood when cutting. Using a circular saw, cut along the lines. Then, sand the cut edges lightly to remove any burrs from around all parts.

  1. Drilling Pocket Holes

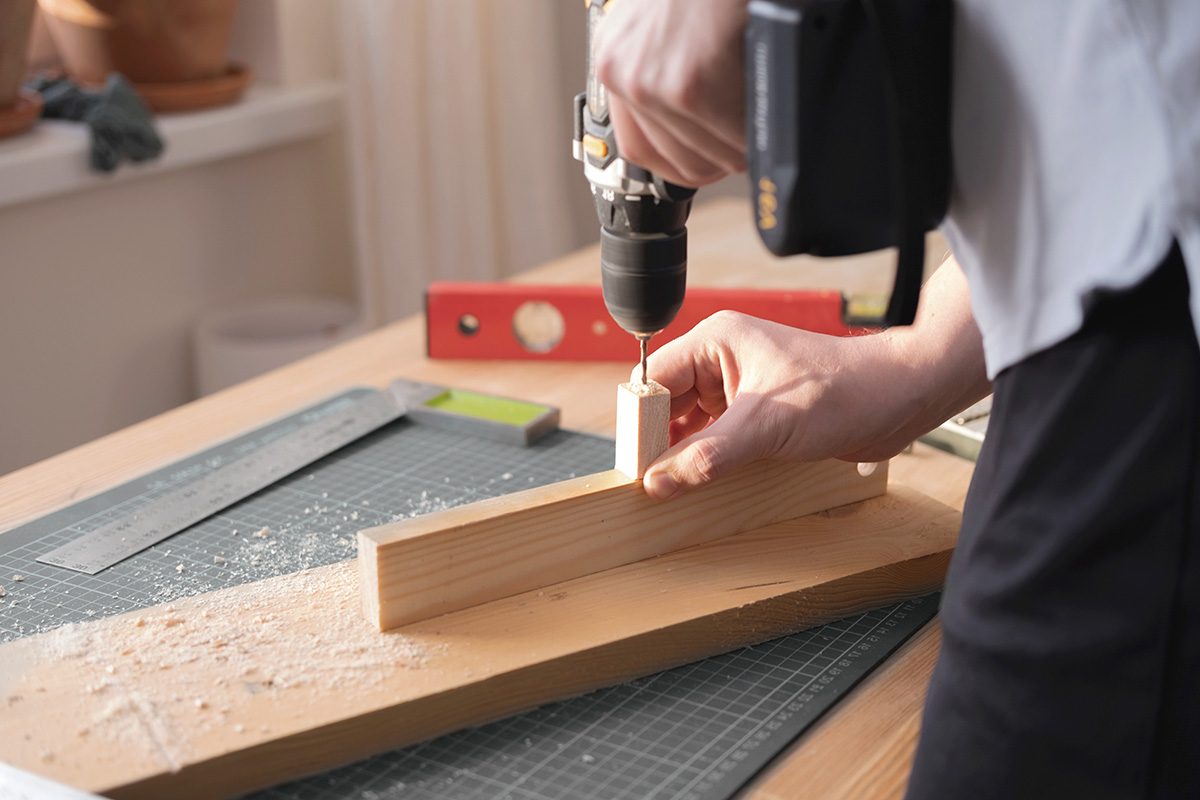
Place from and back pieces of the 1×3 on your work surface. Then, with the use of a Kreg Jig drill out two pocket holes, one on either end of the boards.

  1. Drilling Drawer Face Holes

Position the 1×6 drawer ace on your work surface, pocket holes should face downwards. Then, use your tape measure with a pencil for making two marks located 4-inches from each end of your board, and center its width. You will create two pilot holes with a Drill/Driver, which are used later on for attaching your drawer face.

  1. Adding Cleats to Front and Back Pieces

On the 1×3 piece, you will position an 18-inch cleat on both the front and back to be flush with the ends and bottom edges. Then, you will apply wood glue to the cleat with a bead pattern. Once you reposition it, you will need to nail it using a pneumatic nail gun with ¾-inch finishing nails to keep it in place.

  1. Attaching Cleats on the 1×3 Side Pieces

Remaining cleats should be placed on the 16-inch sides to be centered on the length, while flush with bottom edges. Doing this should create a 1 1/8-inch inset on either end of the cleats. Mark each end of the cleats using a pencil. Cleats should be removed, bead of wood glue applied, and position them in place again. Cleats then get secured with a pneumatic nail gun using ¾-inch finishing nails.

  1. Dry fit Sides

You should set the 1×3 boards upright so cleats are running along the bottom edge. Then, the front and back pieces should have glue applied, positioning them between the sides to be flush with each end.

  1. Assembling Sides

As we are not using fancy tools in this guide, we will use a basic method to hold the square joints for the assembling process. Position a block in the corner, ensuring it is an exact square. Then, clamping it to each side, make sure it is tight. This assists in holding piece in the correct position when inserting and driving the 1 ¼-inch pocket screws into the pocket holes and adjoining each side. When each of the four corners have been assembled, check that the assembly is square, then recheck with a framing or speed square. Measure corner to corner.

  1. Inserting Plywood Base

Place a bead of wood glue on the upper edge of every cleat. Place the plywood on the inside of the frame, ensuring they are on the cleats.

Tip: After painting or staining drawers, running a small clear caulking bead along the edge of your plywood base can help with keeping dust from getting between the 1×3 boards and plywood. In addition, if you plan to place heavy objects in the drawer, you should consider using 1/2-inch plywood.

  1. Attaching Drawer Face

On the 1×6 face, center the front of your drawer. Based on the application used, you should let the drawer face hang under the drawer box. Then, mark the position the drawer is hanging on to the 1×6. Remove the drawer, applying wood glue in the marked space, reposition your drawer. With a Drill/Driver drive in the 1-inch wood screws using your pilot hole in the front drawer and backside of your 1×6 drawer face.

Tip: To achieve a perfect fit, it is best if you completely install the drawer box prior to positioning and attaching the drawer face.

Buy Drawer Boxes Online

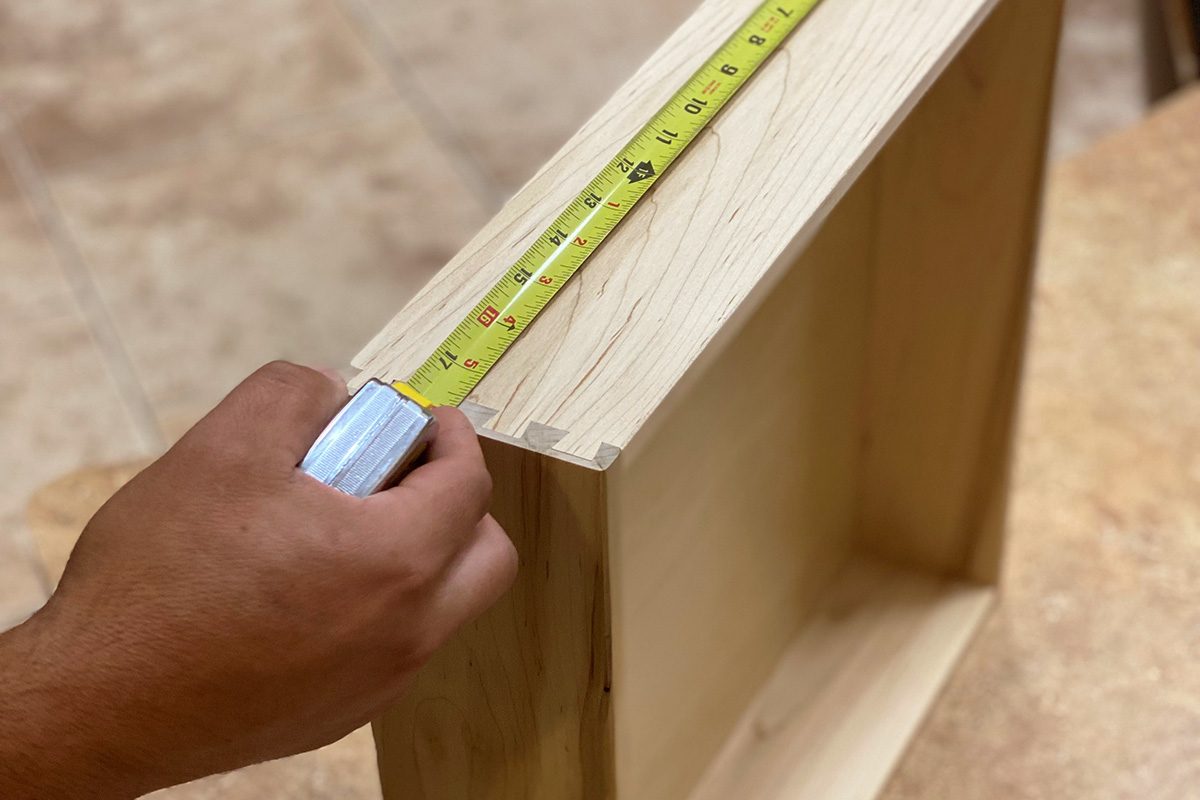
If you don’t have the time, tools, or woodworking skills to build your own drawer boxes but need drawer box replacements for your kitchen or bathroom DC Drawers is happy to build the replacement for you.  Simply take measurements for how wide, high, and deep you need the new drawer box to be and we will fabricate your replacement drawer box and ship it to you.  If you have any questions about how to measure for your replacement or would like to place your order by phone please call 877-917-4887.

The Best Replacement For Unfinished Kitchen Cabinet Doors – For The Lowest Cost

The best cabinet doors are available online and are easy to find.

Simply ask yourself the following questions:

Which would I come more near finding superior quality from, a cabinet door factory or someone who makes cabinets doors on the side, as a hobby?

  1. Which would I expect better quality from, a factory that has invested, perhaps millions in to their machinery or someone that has put a lot less in to it?
  2. Which do I think pays the most for their lumber, someone who buys it by the truck loads or a small supplier?
  3. Which one do I think would demand more of a quality lumber, someone who gets it by the truck loads or an individual customer?
  4. Do I actually feel that a larger cabinet door manufacturer is going to utilize the economy and scale towards a lower cost going by volume when purchasing, with their increasing productivity being automated and computerized machinery?
  5. Would it be safe to say that with all the overhead cost, a larger cabinet door manufacturer will also offer lower prices?

If you have answered ‘Yes’ to the questions above, then you should know that there are several sources that can be found online, sources that can and will, be able to save you anywhere between thirty and fifty percent on all your replacement cabinet doors.

After determining that you do have a choice, and not just with retail hardware stores, but that you have a choice of purchasing between the retail store and the manufacturer themselves. Which means that you have the choice of buying your replacement cabinet doors online, straight from the manufacturer that supplied the retail store in the first place.

Do this: Visit your hardware stores and note the prices they are charging. Now, go online and compare those unfinished kitchen cabinet door prices to the one’s you find straight from the manufacturer, the one’s that supplied those retail stores. You do the math; I think the amount you could save will shock you.

What Are Melamine Cabinets?

What Are Melamine Cabinets

If you’re searching google for “What Are Melamine Cabinets?“, we have the answer.  Melamine is a great option for budget-conscious homeowners who want to have highly durable and easy to clean kitchen cabinets and cabinet drawers.

Melamine is fabricated by heat-sealing a substrate between paper which has been saturated with thermally fused melamine resin. The substrate can be plywood, MDF, or pressed wood. Thermally fused melamine is a mixture of formaldehyde and melamine which is fused into larger and safer molecules.

What Is Melamine Board

Melamine is used in various industries and because of that there are different chemical make ups. For example when chemists are talking about melamine they are talking about Cyanuramide. In this form the material is considered harmful if ingested.

In contrast the melamine used to create melamine kitchen cabinets and melamine cabinet drawers are made from thermally fused melamine (TFM). These products are manufactured using formaldehyde, yet are constructed to be safe through the combination of the melamine resin and the formaldehyde. This blending of chemical make ups results in larger molecules and neutralizes the potentially harmful characteristics of formaldehyde.

This makes melamine board safe for installation in kitchens, bathrooms, and even safe for the woodworkers who construct cabinet elements to size for our cabinetry projects.

Melamine’s Design Flexibility

TFM is a thermally bonded surface material which covers medium density fiberboard, plywood, or pressed wood. Before the TFM is used to encase the substrate it can be printed with any design or color desired. This makes Melamine a highly desirable option for cabinetry projects for homes or commercial properties.

Re-modelers, kitchen designers, and savvy homeowners love the wide variety of colors that can be ordered. This highly customizable characteristic of melamine allows an incredible level of unique design.

The Melamine Pros & Cons

Understanding what Melamine is made from, that it is safe to build with, and the other characteristics of Melamine helps equip designers and homeowners alike to make the best decisions for their cabinetry projects.

A Safe Building Material

Melamine or TFM is safe to work with and install in our kitchens and bathrooms. The material is produced with formaldehyde, yet because of the way it is bonded with the melamine resin it is not harmful.

Made From Sustainable Sources

The substrate melamine is thermally fused to is sourced from recycled wood scraps and sustainable-growth forests.  Melamine is usually made from products which use pressed board, medium density fiberboard or plywood. This means that the production of melamine cabinets and melamine cabinet drawers does not rely solely on freshly cut lumber, as is the case for solid wood.

More Affordable Cabinetry

Melamine cabinets and cabinet drawers are less costly to make when compared to solid wood alternatives.  This means that designers can offer homeowners more for their money.  Flexibility in choice means that budget can be used for fixtures and other ornamental embellishments.

Melamine Drawbacks

There is no perfect building material. Wood costs more but is lighter and holds screws better. Melamine will not split like wood, but it can shatter with enough blunt force. When this happens rough wood substrate is exposed. The substrate is also highly absorbent and will expand and warp when it gets wet. These issues can be mitigated by using melamine which has quality substrates like custom graded MDF cores. High quality MDF core melamine provides better anchoring for screws and fasteners used to install cabinet doors.

Melamine Can Be Repaired

Life happens and so does damage to kitchen cabinets.  Thankfully melamine can be repaired, re-glued, and otherwise reconditioned to look like new. Sections that are peeling can be glued back down or like-colored wood filler can be used to fix areas that chip or large breaks.

Choosing Melamine For Your Kitchen

Melamine is designed to as an affordable, easy to clean, and attractive option for homeowners. Being able to get a kitchen or bathroom which is beautifully finished with a wide variety of colors for less than solid wood is an attractive option for many designers and homeowners. This makes choosing higher quality appliances or counter-tops a more affordable option.  Melamine is a hugely popular building material for both melamine cabinet and melamine cabinet drawer boxes.

Stay tuned for more from the expert drawer box manufacturers at DCDrawers.com

Dowel Joint Advantages & Disadvantages

Are you searching the internet for “Dowel Joint Advantages and Disadvantages“? If so, this guide should help to understand joining wood with dowels. Here we list all of the advantages and disadvantages of dowel jointery.

Table Of Contents:

Use the links below to guide you to the section you are interested in.


Dowel Joint Advantages

Replacement Drawer Box Page Divder

  • Dowling is a quick process.
  • It helps to ensure a neat finish.
  • There is no need for screws, nails or other equipment.
  • Dowel joints are the strongest type of joints when it comes to woodworking, especially when using multiple rows of dowels.
  • Dowels help to create strong joints that are easy to make at home.

Dowel Joints happen to be a technique that is used in woodworking, where two wood pieces are attached by a dowel or wooden pin. In the wood pieces, a hole will be carved where the dowel goes. This is a way to attach wood pieces that you should think about the next time you are woodworking for the bottom reasons.

There’s No Need For Hardware

Replacement Drawer Box Page Divder

Dowel joints help to remove the need for screws, staples and nails. This helps to remove the potential injuries that often happen while working with hardware, but it can also help to give the project a more finished look as there is nothing to disrupt the grain pattern.

It Is Secure

Replacement Drawer Box Page Divder

The pin runs inside of the wood, so the joint is quite strong, and that is a lot stronger than using glue or nails to attach the wood.

Easy To Assemble

Replacement Drawer Box Page Divder

Once you have decided on how big the dowel needs to be, you have to hollow out the holes that the pin goes in. Just slide the pin in the piece of wood and then attach the other piece and that is it. It is that simple.

Versatility

Replacement Drawer Box Page Divder

The dowel joints are basically used in a right angle or flat angle joint because it can be made to work in more complex joints. The dowel joints can also be used in concrete construction and metal work.

Dowel Joint Disadvantages

Replacement Drawer Box Page Divder

  • Tenon and mortise joints are stronger, but it takes a lot longer to create
  • The alignment could be hard to get for beginners as it requires the use of a dowelling.

Disadvantages Posted by Customers

Replacement Drawer Box Page Divder

The main disadvantage is that they are weak. When it comes to tenon and mortise joints, the face grain cheeks of the tenon are completely in contact with the face grain side of the mortise. The glue also holds best in this situation. When it comes to dowel joints, there isn’t any face to face grain contact which causes the joint to be weaker.

Misalignment

Replacement Drawer Box Page Divder

When making a doweling joint, if the bit slips even just a little when starting the hole, or it isn’t lined up just right, you will have a lot of issues getting the joint aligned and/or getting the dowel in.

Besides the strength of the dowel joint, it is hard to get it aligned right, especially if there isn’t access to a drill press.

Dowel Shearing

Replacement Drawer Box Page Divder

Dowels will eventually shear. Then you have to drill it out and then insert a new dowel.  The higher quality dowels used the longer the drawers will last.

Shop Dowel Drawers with DCDrawers.com

Replacement Drawer Box Page Divder

Thank you for reading Advantages And Disadvantages Of Dowel Joints. Stay tuned for more from the expert drawer box manufacturers at DCDRAWERS.COM. Shop Dowel Drawers online.

Dovetail Drawer Construction Guide

Dovetail Drawer Construction Guide

Are you searching the internet for “Dovetail Drawer Construction“? If so, this guide should help.

Building a dovetail drawer happens to be one of the favorite things to do. I have always thought that were just for the best woodworkers, and it would be very hard and difficult to even master. While it does take some planning as well as careful setup, the average home woodworker should be able to achieve it.

First thing that should be mentioned is that the quality of the dovetail jig and your overall set up are very important for making a dovetail drawer. I love my dovetail jig that I got as a gift from Rockler. This jig is able to make various dovetail joints. For the drawers, I have used the half-blind dovetails.

Items Needed For Drawer Construction:

  • Dovetail jigs
  • Table saw
  • Router bushing and bit set
  • Surface planner
  • Plunge router
  • Miter saw
  • Sanders
  • Finishing supplies
  • Clamps

Step 1:

I normally make drawer boxes out of maple wood. These give the drawers a strong and resistant feel for everyday ear and tear. Although, because if the hardness, it isn’t as forgiving and for the first few practice runs this is a great choice. One important thing is that your materials need to be exactly sized and matched. I often will surface plane my materials to be between 5/8 inch and ½ inch and will use my joiner planner and table saw to make stock materials that are in exact inch multiples. The rockler dovetail jig will produce drawers that are even in height. Be sure that you are verifying the dovetail spacing on your jig before you start.

With the half-blind dovetails, the back and the front of the drawer will be cut to be the exact final width. For instance, I am using side mounted 100lbs ball bearing slides that need the drawer to be 1 inch narrower than the rough opening for a drawer. The sides are then cut to be ½ inch shorter than the wanted depth of the drawer. It is vital that you have selected the drawer slides before constructing your drawer to ensure that it will fit right.

Step 2:

The drawer back and front will then be loaded into the horizontal part of the jig and then clamped. The side will be positioned offset in the vertical part of the jig by integrated stop that will ensure a right ½ inch offset alignment. It is vital to know that you will be viewing the eventual inside of your box. Aligningthe teeth bar and back bar are going to be bested on the material thickness. Small amounts of change will result in larger changes in the final box, so ensure that you are making small adjustments. It is recommended that you test on scrap material before you move onto finished parts. Once done routing, each joint should be labeled as 1-4. The jig produces a matched set which will give you the best fit for joints that are cut in the same routing step.

Step 3:

Your router needs to be setup with the right dovetail bit and bushing. The bushing will ride along the jig teeth. The height of your bit will determine the tightness of the fit. I learned this myself after becoming frustrated with a fixed based router to use a plunge router with micro-height adjustable stop to dial in the joint. There is a differences that just 64th of an inch can change the joint from too loose to too tight. When you are using maple wood, you have to ensure that your joint isn’t too tight because it can cause the wood to crack with the final dovetail. Your joint should just need a gentle tap with a rubber mallet to get it together.

Step 4:

Once you have carefully set up the router, it will now be able to run around each of the jig teeth to provide a dovetail profile. You will begin to notice that the half-blind dovetailhas the tails and pockets on the inside of the drawer have become rounded. This is part of the joints that will become invisible once it has been put together. It is vital that you take your time to make sure that all of the materials have been removed properly. Once the jig has been dialed in, the drawers can be done quickly. It does take around the same amount of time for 10 drawers as just one drawer.

Step 5:

I prefer to use ½ inch plywood as the bottom of the drawer. ¼ inch material may be used for smaller drawers but it can cause it to sound quite hollow, or cause sagging in larger drawers. Because of this, I have begin to rabbit the edge off of the bottom to make the thickness 3/8 inch. This lets it fit in a dado to the drawer sides, which becomes invisible once it has been assembled. If a full ½ dado was used, it would show in the final dovetail joint. The dado for the bottom needs to be aligned with the center of the tail.

Step 6:

Your drawer should be dry fit with any type of fine adjustments that are made with sand paper or sharp chisel. The rabbited part of the drawer bottom needs to be towards the drawer bottom to make it invisible in the final product. Birch plywood may be used for the bottom because it looks like maple when it is finished. Although it is more expensive, maple plywood makes sure that the bottom and sides match when finished and it adds anextra nice touch.

Step 7:

Once a fit has been made, the drawer can then be glued and clamped. The whole surface of the dovetails will need to be coated in glue. Although, the bottom of the drawer shouldn’t be glued into the dado. The bottom needs to be sized to allow for contraction and expansion by being around 1/16 inch smaller than the maximum size that would fit into the dado slot. Dovetails will hold the drawer together without any clamping, but I do clamp mine to make sure that the drawers will be perfectly square while they are drying for a tight joint. For larger drawers, use multiple clamps.

Step 8:

Finishing starts by sanding the drawer to achieve smooth joints over the dovetails. A large amount of time needs to be spent on this step. I begin with a 60 grit to level the surface and then follow up with a 120 grit and then a 200 grit sanding disc on my orbit sander. Between 60 grit and 120 grit is when I use high quality wood filler to fill in the imperfections within the joints.

Step 9:

The finishing method that I personally use is just a water-based satin polyurethane and I apply around 2 or 3 coats finish followed by 220 grit sanding between the coats. This is where the hard work really pays off. The drawer will be strong and it will be quite hard to pull the front off the drawer. I also use a custom branding iron to put my logo on the sides of the drawers.

Step 10:

Installing a good quality under mount or ball bearing slide hardware and drawer fronts where it is needed will be the last step. If everything has been built in a good square, then the process is easy. The 3-inch-tall dovetail drawer will make a great roll-out shelves in kitchen cabinets.

Thank you for reading “Dovetail Drawer Construction Guide” by DC Drawers. Stay tuned for more from the experts at DC Drawers.

Choosing Drawer Slides Guide

Choosing Drawer Slides Guide

If you are searching for “Choosing Drawer Slides Guide” you are most likely updating your kitchen or if you are just simply putting in new cabinetry. With all of the different options for slides it can end up being a ghastly task. This guide is meant to simplify the options and help you understand what is available so you can get the best bang for your buck.

So, how do you choose from all of the different options out there?

The following is an introduction to characteristic basics to slides, including several features that are offered and their benefits to many of the types of slides out there. If you first take into consideration what it is you are wanting from each category, it is going to help to streamline any further searching.

A tutorial on how to choose the correct drawer slide mount:

 You will first need to figure out whether you are wanting a side mount, center mount, or an under mount slides. Your decision will depend on the amount of space you have in between the drawer box and your cabinet opening.

  • Side-mount slides – these come in pairs (or sets), and it comes with the slide that attaches to both sides of the drawer.
  • They are available with a ball-bearing and a roller mechanism.
  • They usually will require a clearance of 1/2” in between drawer slides and the side of cabinet opening.
  • Center-mount slides – these come as single slides and they mount under the drawers’ center.
  • They are available in a classic wood version, and they are also available with a ball-bearing mechanism.
  • Its clearance will depend on the slides thickness.
  • Under-mount slides – these are the ball-bearing slides and they come in pairs or sets. They mount to the cabinets sides and also connect to devices that lock that are attached to the drawers under side.
  • These are not able to be seen when the drawer is open, which make them a better choice to highlight one’s cabinetry.
  • These require less of a clearance in between the sides of the drawer and the opening of the cabinet, which is usually about 3/16” to 1/4” on; each side.
  • These do require a specific top and bottom clearance for the opening of the cabinet, typically, drawer sides should not be over 5/8” in thickness.
  • The space between the drawer bottom’s underside and the drawer sides themselves has to be 1/2”.

A tutorial on drawer slides and mounting types –  and also a tutorial on drawer slides and ball-bearing vs. roller style of the slide mechanism slide length: 

  • Determine the length of slide needed.
  • The slides that are used the most will come in sizes that range between 10” and 28”. Although, special applications are available in shorter or longer slides.
  • You will measure the side-mount and the center-mount slides for distance from the cabinet’s front edge, to the inside-face of the cabinet’s back, now subtract 1”.
  • You will measure the length of the drawer for the under-mount slides. The drawers and the slides have to be the same length in order to work correctly. 

Extension: 

First you will need to know how far out you want the drawer to come out when it is opened. 

Tutorial on drawer slide – Drawer extension:

Weight rating 

Consider what it is the drawer will be holding.

Generally, slides are rated for the amount of 75,100 and 150 pounds, although, there are some that are rated at a less amount, as well as some that are specialty slides that can handle up to 220 pounds.

Weight rating is significantly important when it comes to choosing slides when it is for applications that are heavy duty, like file drawers and pantry pull outs.

Tutorial on drawer slide – weight rating, lengths, and the finishing options an, color: 

  • Is there a certain color that you are looking for?
  • Slides mostly come with a zinc finish.
  • Also available in black is the center-line Life-time Series 757 (which are nice for entertainment centers).
  • Available in white or brown are the Blum Self-Closing Epoxy Roller-slides

Motion: 

You will also need to decide if you are wanting the special motion features. 

  • Push to open – It only takes a nudge to open this type of slide, so there is no need for knobs or handles. A great option for today’s modern kitchens, and in places that hardware is not wanted. 
  • Self-close – When drawers are given a push the slides will return the drawer into the cabinet.
  • Soft-close – These slides will also add an effect of dampening to the feature of self-closing drawers, and return the drawer back into the cabinet gently, without ever slamming it.

Nationwide Drawer Slide Supplier

If you have broken drawer slides, are starting a new cabinetry project, or are simply remodeling your kitchen or bathroom Drawer Connection has the best selection of drawer slides. We have soft close, push to open, self close, and many more quality options that keep your drawers opening and closing smoothly. Visit our site to get started or call us at 877-917-4887.

Best Way to Organize Kitchen Cabinets & Drawers

Best Way to Organize Kitchen Cabinets & Drawers

Organizing experts have offered expertise for organizing storage and your kitchen.

Your kitchen is the most used part of your home, if it were organized and simpler to use, your life would be a lot easier. Professional organizers suggest these simple steps to organize your kitchen and make your life flow easier when it comes to preparing meals.

Empty your cabinets

Pull everything out of your cabinets and go through it. Donate or discard things that aren’t used all the time, duplicated items, broken things, or things that you forgot you even had. Do this with every drawer and cabinet, setting up different areas on the floor for every group. Be ruthless as most kitchens are short on storage space the goal is to only have things that you use and love.

Group like items

Once the cabinets are empty, you should consider what is best in terms of how to group items. Sort out the baking items and put them together. Sort cooking items and put them together. Group dishes you eat from, holiday, glassware, and other seasonal items that get used for special serving or entertaining pieces.

Organize the cabinets

Now that everything is grouped, decide where everything should be stored. Baking and cooking pieces need to be kept close to where the food is prepared. Utensils need to be in a drawer closest to the preparation area. Glassware needs to be close to the sink or fridge. Create a tea or coffee station that has mugs, filters, sugar and put it next to a water source. This way you can avoid having to cross the kitchen for what you need to make your morning beverages.

Use clear containers to store items

Using clear containers to place inside of cabinets. Group things like gravy mixes, sauce packets, hot cereal packets, hot cocoa and put them in clear containers to keep them from being scattered everywhere. Use clear plastic shoeboxes to store food like jello or pudding mixes.

Store containers and lids together

Get rid of containers that don’t have lids and store the other containers with the lids on them or store the lids in a large container so that they stay together. You can do this with pot and pan lids. A large clear box will help to keep them together. You could also put them on their sides in a wire rack.

Make use of vertical space

Place hooks under cabinets to hold your coffee mugs above a counter or to hang stemware racks in the same spot of wineglasses. This will free up cabinet space. You could also use adhesive hooks on the pantry or cabinet doors to hold tools like measuring cups, kitchen gadgets or oven mitts. You should consider using wall space or ceiling racks to hand pans and pots. Keep in mind that any space that you hang something up will free up cabinet space.

Lazy Susans

Rotating trays can be used to hold things like cooking ingredients as well as medications and more. You can use lazy Susan’s in your fridge as well, so that nothing hides in the back to freeze and spoil.

Use drawer dividers

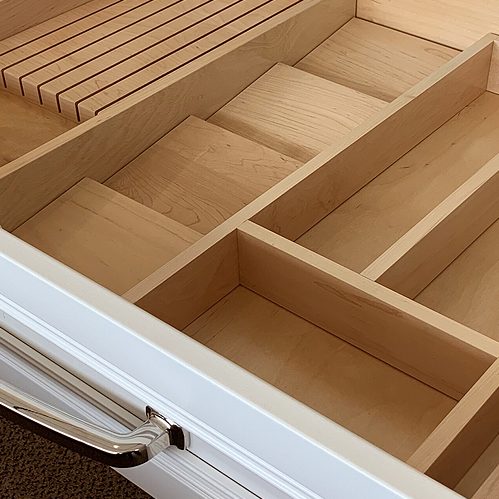
Drawer dividers are perfect for cooking utensil drawers or junk drawers. Everyone needs a place to keep those little random things, but they don’t have to be junked up and overflowing. Drawer dividers will let you assign spots for things, and you will be able to find them when you need it.

Sort papers

Get a sorter box that you can hang on the fridge for takeout menus, notepad/pen, coupons, and other types of papers that are on counter-tops. Each paper type should have its own section in the sorter.

Clean out your fridge

Keep you trash bags near your trash can and throw a stack of loose bags in the bottom of the can. That way when you pull one bag out, there is another one ready to go. If you need to put out the garbage once a week, use that time to clean out the fridge every week. See what foods need to be thrown away, and throw it out and then take your trash to the curb then. Your fridge will only have current items and will be less cluttered and it just takes a few minutes.

The personal work style that you have will say where you store and use items in your kitchen, but the goal is to make that room and the contents serve the needs you have efficiently and smoothly. If you simply invest the energy and time to decluttering and organizing the kitchen, then it will be an investment that pays off in happiness for years.

Kitchen Organization Starts With Good Drawers

If you want to make the best of your kitchen organization good drawer inserts and slide out shelves are the key to making your space work for you. Being able to slide your shelves out and reach the back with nearly no effort makes it so you can have a place for everything, and everything in it’s place. Contact the drawer box experts for more information.