What’s The Best Wood For Cabinetry?

The best wood for cabinetry is widely considered either red oak, poplar, maple, mahogany, or plywood.  Which solid wood type is best for a specific project depends on budget, if the cabinetry will be painted, and personal preference.

Everyone wants to know that the home improvements they’re making are durable and add real value to the property.  So what is the best wood for your cabinets, drawer boxes, and cabinet doors?  

    1. Best Wood For Cabinetry
      1. Cherry, Maple, Ash, Hickory & Oak
      2. Birch, Beech, White Oak, & Red Oak
      3. Walnut & Mahogany
      4. Spruce, Pine, & Fir Softwoods
      5. Plywood
    2. Best Wood For Painted Cabinets
      1. Wood Grain Paint Challenges
    3. Best Wood For Painted Cupboards
    4. Order Cabinet Drawers

Read about each of the different types of wood in this article to judge for yourself which wood type you want for your cabinet doors, cabinet drawers, and home.

Best Wood For Cabinetry

Your bathroom and kitchen are focal points in your home.  That means that your cabinets need to be durable, functional, and attractive quality materials. Boxed or prefabricated cabinets are built using low grade, thin materials that are overlaid with a wood veneer. Cabinets are built using hardwood solids and plywood, and both materials will matter when you are picking what is best.

Cherry, Maple, Ash, Hickory and Oak

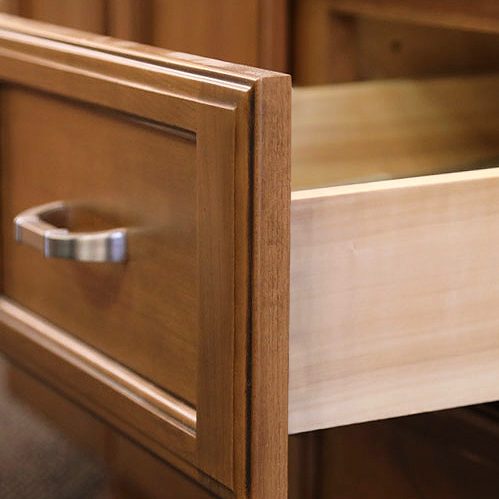
Cabinet doors and face frames are often made from solid hardwoods. Wood species such as hickory, maple or beech will resist scratching and denting at a higher degree when compared to other softer species like walnut, alder or mahogany, but they will also cost more.

Hickory and maple for example are two of the hardest wood species that are used for cabinets and are normally more expensive than softer woods like ash or oak. Although imported or exotic species no matter what the density is will normally cost more than domestic hardwoods.

Other exceptions do include domestic hardwoods that are trendy. Cherry for instance, because of the subtle, intricate grain pattern and warm rich color is considered a luxury wood. It will normally demand a higher price than other domestic woods.

Birch, Beech and White or Red Oak

One of the most commonly used hardwoods by cabinetmakers is medium priced red oak that has arched or complex flame grain patterns. White oak has straighter grains but it will cost more than red oak.

Other types of domestic species include beech woods that have straight graining and birch that has streak and bands of brown will be priced lower than beech because of the availability and the lost cost of birch plywood.

Walnut and Mahogany

Other types of commonly used hardwoods are the rich and dark brown walnuts and the straight grained red mahogany. Mahogany gives warmth while walnut, which is similar in cost and hardness to mahogany, happens to add elegance to cabinets.

Other wood species can be stained to match existing colors that are in the home, although some will react to staining better than other wood. Ash, pine, and oak absorb stains evenly. While Birch and maple can blotch if not prepared for stain. Walnut and cherry which are known for their colors, are better left as is.

Spruce, Pine and Fir Softwoods

Cone bearing evergreen trees provide softwoods, which are normally used for structural purposes. Whenever it is used for cabinets, softwood like pine will give a certain look to cabins, cottages, lodges and country settings with the knotty character and soft tones of amber.

Other softwoods like spruce and fir will be straight grained but they are tougher and harder than pine. These are normally used for utility or economy applications such as in shops or garages.

Cabinet Grade Plywood

Plywood is a glued and laminated wood that is engineered and overlaid with hardwood veneer and is normally less than 1/16 inch. The appearance of this is the only difference when it comes to comparing grades which is important for determining cost and quality. Plywood that is designated AA or premium will be the most expensive. It is often called one piece faced, the veneer is rotary cut in a single piece to keep it from splicing.

Grade A plywood is a bit cheaper than AA and the veneer is spliced side by side and color matched to give it consistency. Grades B, C, D, and E will be less expensive and will be lower grade in appearance with each lower level having inconsistent colors or additional streaks. Shop grade or economy plywood is the cheapest and it has allowed damage or defects. At least 85% of shop grade plywood is normally usable with a good cabinet maker that can work around the defects.

What is the best wood for painted cabinets?

Similarly, as any craftsman needs to choose what medium to utilize, woodworkers must choose what wood to work with. The appearance, shading, cost, planned utilize, workability, and maturing conduct are for the most part contemplations.

In any case, so is a wood’s paintability or capacity to take a stain. In the event that recoloring, you need to know how the wood grain will show and how the wood shading influences the shade of the stain. Here’s a snappy guide from the Pros who’ve addressed the inquiry, “What’s the best wood for painted cupboards?”

Wood Grain Paint Challenges

Paint-review wood has a tendency to be of the more tightly grained assortments, for example, hard maple, soft maple, pine, and poplar, among others. Open grain wood has a rougher look and likely needs filler to look great when painted. It’s best to work out of tight-grain woods to keep away from this.

Poplar and delicate maple are well known for most parts of a bureau—confront outlines, end edges, and entryway boards—for the most part because of cost and workability. In any case, a few craftsmen find that poplar marks effectively. It can likewise ingest the principal layer of paint rapidly.

A portion of the other tight-grain woods are somewhat less demanding to work with, yet their accessibility or cost isn’t viewed as a sufficient exchange off. Hard maple can be another great decision, despite the fact that it can move marginally more than different woods with changes in stickiness.

MDF can be utilized for face and end outlines. A few woodworkers utilize it for entryway boards, yet it can be dubious to wrap up. Along these lines, other wood assortments are regularly utilized for rails and stiles. MDF stays prominent as it is steady and hence useful for bigger pieces. Birch plywood or prefinished plywood is another possibility for these more drawn out segments.

So what’s the best wood for painted cupboards?

Similarly, as with most things, you won’t discover any deficiency of assessments, however there seems to be some expansive concession to when the best sorts of wood are for painted cupboards. Tight-grained woods that are workable and solid remain a prevalent decision. Whatever material you pick; the staggering understanding is to set up the wood’s surface first. Utilize filler if necessary, shellac on hitches so they don’t seep through, and be sure to sand over any sharp corner that may not hold the paint. Below is a fast breakdown of the forested areas commonly found in cupboards:

      • Hard Maple: light, dense. Grain: stainable, close grained, and fine textured
      • Hickory: durable, hard, and strong; white to reddish brown. Grain: coarse and straight
      • Cherry: Moderately heavy, strong, and hard; sands smooth. Grain: red and finishes beautifully
      • Soft Maple: strong, hard, and medium density; paint grade. Grain: fine textured, close grained
      • Mahogany: varies in color between medium red to reddish brown. Grain: medium coarse texture, straight to interlocked grain
      • Beech: heavy, medium to hard, pale colored; stains and polishes well. Grain: tight and fine. Similar to birch and maple
      • Alder: Reddish brown color, easily dented. Grain: straight grain, even texture
      • Red Oak: heavy, very hard, and strong. Grain: coarse texture with easy sanding and finishing
      • Red Birch: red in color softer than red oak. Grain: tight grain, easy to finish
      • Douglas Fir: light rosy color that will redden. Grain: tight knotted and close grained
      • White Oak: light to dark brown in color, heavy and hard. Grain: straight grained with medium to coarse texture
      • Knotty Pine: lightweight with tight and small knots. Grain: straight with an even, fine texture

High Quality Cabinet Drawer Boxes

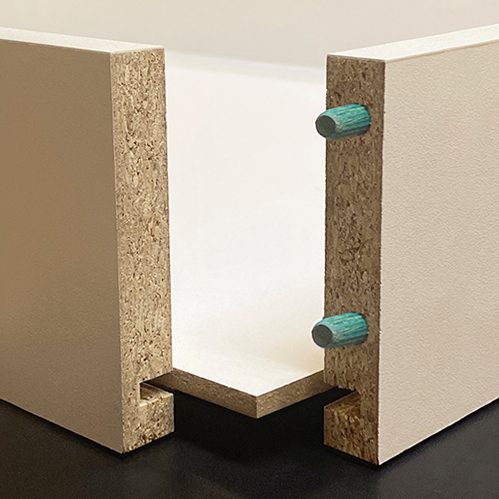
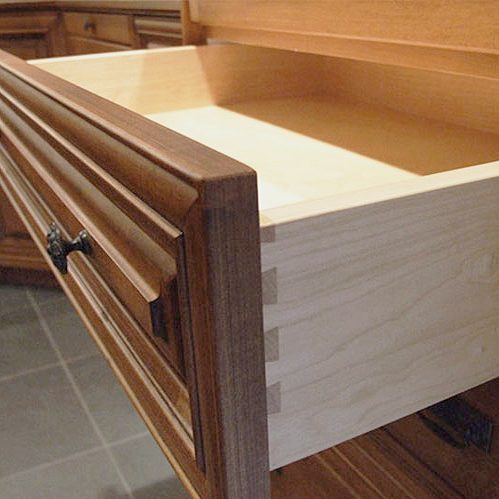
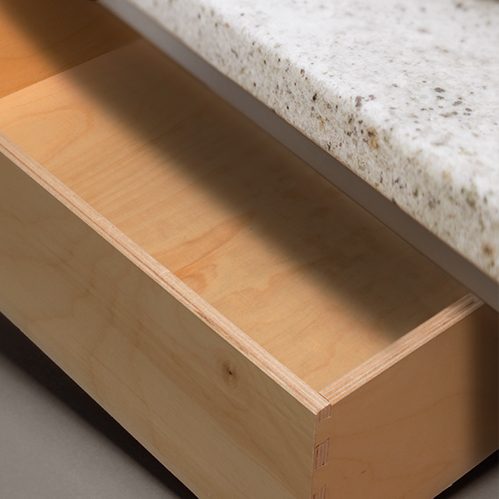
If you’re looking for the best quality cabinet drawer boxes at the best prices there isn’t a better source than Drawer Connection.  We give you your choice of wood and only source the highest quality raw materials.  All of our fabrication is high precision and made to last.  Whether you’re choosing a solid wood with a dovetail joint or a melamine with a dowel joint, every single drawer box is built to last!

How To Fix A Broken Drawer Slide

To fix a broken drawer slide try adjusting the drawer slides to see if that will solve the problem.  If not you can easily and inexpensively replace them.


A drawer in your kitchen or bathroom that doesn’t open smoothly is annoying.

It’s possible to repair or replace the drawer slides to make them glide with ease.

Read this post to learn how to fix or replace your drawer slides.


How To Fix Drawer Slides

If you’re searching Google for “How to fix a broken drawer slide” you’ve got a drawer that isn’t opening smoothly, is rubbing against the frame, or is just simply stuck.  The drawers in our kitchens are used, abused, and relied upon to hold everything we need.  Older hardware might have small wheels, flimsy construction, worn out bearings or rollers, and need repair.  There are replacement drawer slides made for virtually every imaginable drawer and cabinet design.

Types Of Drawer Slides

There are 3 basic designs built by many manufactures in different materials.  The three main types are side mount, bottom mount, and bottom mount single.

Side Mount Drawer Slides

Side-mount drawer slides are mounted on the side of the drawer box and telescope out to allow the drawer to extend further than a bottom mount drawer slide.  These drawer slides are generally rated to handle more weight and are attached either half way up the side of the box, or at the bottom.  To know for sure which design you have, if it doesn’t telescope, it isn’t a side mount drawer slide.

Bottom Mount Drawer Slides

Bottom Mount or Under Mounted drawer slides are one of the most common types of drawer slides.  As the name suggests the slides are mounted to the drawer and cabinet under the drawer on a track. There are two common configurations of bottom mount drawer slides, one is flat and attaches at the side, the other is bent at 90° and fits over the edge of the drawer.   The key element to knowing which you have is if the track attaches to the bottom of the drawer, or not.

Bottom Mount Single Drawer Slides

In some cases a bottom mount single drawer slide would have been selected for your kitchen.  It is a economy version of a bottom mount drawer slide and features a single centered mount for the drawer to attach to the cabinetry.  Some have a corresponding track, while others just have a wheel that fits into the track. Typically this is a mount used for inexpensive cabinetry and has lightweight drawers.

Adjust Before Replacing Drawer Slides

If you are experiencing issues with your drawers there might be an easy fix.  Drawers open smoothly when the slides are adjusted correctly.  Over time and with use they might come out of alignment and a simple adjustment may return your drawer slides to perfect working order.

Drawer slide adjustments are done via oval shaped screw adjustments found at the back of drawers.  Fit your slides or wheels into the cabinet and slide the drawer in the cabinet and move it back and forth a few times.

If you notice it is too tight, rubs the side, or sticks you should loosen the screws and tap the drawer in whichever direction will resolve the sticking or rubbing. Once your drawer will slide in and out smoothly you should re-tighten the screws.

How To Replace Tracks & Drawer Slides

To replace your slides and tracks you need to identify the type of slide you have, make sure you either identify what size you have or measure, and then disconnect the drawer and replace the hardware.

Measure Twice, Buy Once

Before ordering new drawer slides make sure you know what type you have and what size you need.  Most times the length is stamped on the side of slides.  If it isn’t make sure you measure it and replace it with a slide of the same size.  This saves wasted time, money, and frustration.

Slide Labeling

Drawer slides sold today carry labeling for installation.  After you’ve removed your old hardware inspect your new slides for stamps.  You will find markings DL (drawer left) AND DR (drawer right). You will also see pieces that connect your drawer to the cabinetry marked with CL (cabinet left) and CR (cabinet right).

How To Disconnect Slides

Side mount slides have a tab or lever which will release the drawer typically located about halfway down the side of the drawer when in the open position. Bottom mount slides generally just pull out by jiggling the drawer, tilting it slightly, and in some cases might have a tab that needs to be pushed to release it from the track.

Drawer Slide Replacement Steps

Follow these drawer slide replacement instructions step by step to make replacing your drawer slides a breeze.  Replacing the drawers is pretty straight forward, remove old, install new, and ensure the adjustment is perfect.

Step 1 – Remove Drawer & Old Drawer Slides

Take the drawer out of the cabinet by removing all of the screws.  Make sure you buy new slides of the same design and have openings that match the size and position of the screws.  It saves a lot of effort if you use a handheld power tool to remove the hardware.  Ensure that you set the tension lower when reattaching your screws to prevent splintering of your drawers.

Step 2 – Match Up New Slides & Attach

Take your new drawer slides out of the packaging and read the labels to sort them into sets of right and left hardware.  Attach your tracks and slides to the cabinets and drawers with your driver with the screws that came with the new hardware.  Make sure you don’t over tighten the adjustment screws which are located at each end.  Place screws in these areas but don’t tighten them down.

Step 3 – Install New Drawer, Test, Adjust

Slide the drawer into and out of the cabinetry and pay close attention to if it is straight, rubbing anywhere, or if it is sticking.  If so make sure you loosen the adjustment screws in the oval shaped holes and tap it in the direction which will resolve the problem.  Always test and adjust until the drawer slides easily and smoothly, then tighten down your adjustment screws.

Buy New Drawer Slides & Drawer Boxes

If your drawer slides are worn out or you need new drawer boxes DC Drawers is your source for high quality drawer slides, and the best drawer boxes.

We offer the top brands of new and replacement drawer slides and custom made drawer boxes.  In addition we offer in drawer power outlets and many other cabinet drawer convenience options.  Read about how you can get cheap drawer boxes that are the finest quality at the best prices.

Shop: New & Replacement Drawer Slides

How To Replace Kitchen Drawers

If you are searching for “How To Replace Kitchen Drawers“, “Replace Kitchen Drawers“, or “Replace Kitchen Cabinet Drawers“; Drawer Connection can help!  We will also show you how to order a replacement drawer, or build the drawer yourself!

How To Replace Kitchen Drawers

Accidents happen and if you’ve got a broken drawer in your kitchen you’ll want to fix it so you don’t have items falling out of your drawers.  Parts of homes wear out and the drawers in our kitchens are no different. When they break it can be frustrating to lose the storage space and an eyesore having an open gap.

Some “quick-and-dirty” handymen will do things like nail or glue the drawer front back in place and just forget there ever was a drawer, perhaps to make a tee time or get back to watching TV. Learning how to replace kitchen drawers need not be a painful project, let us show you how here.

Kitchen Drawer Replacement Steps

Use this step by step guide to learn how to replace kitchen drawers and where to buy replacement drawer boxes:

1. Measure The Replacement

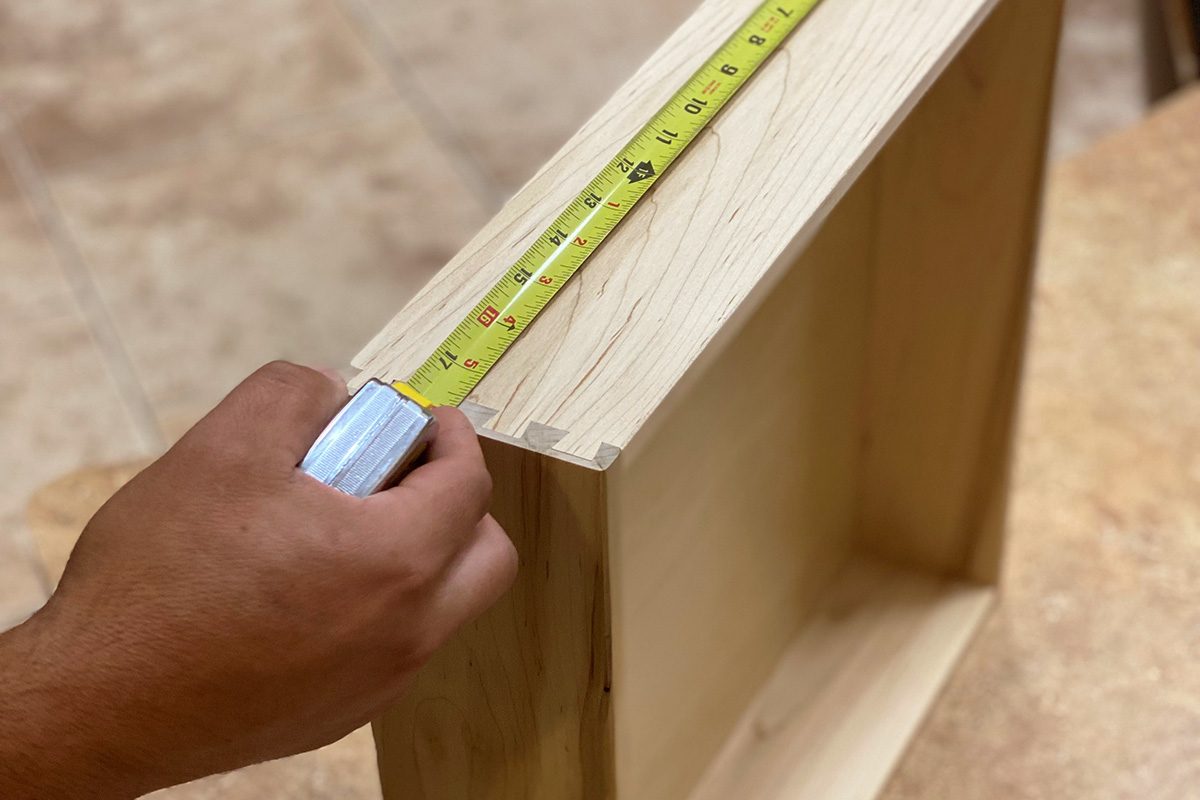
To get started you will need to know the size of the replacement you need. Get the height, width, and depth of the opening for the replacement drawer.  Take off an inch for your height and width measurements and at minimum of a half inch from the depth which will allow for easy fitting and drawer slides.

2. Build or Buy a Replacement Drawer Box

Drawer boxes are typically custom built for each kitchen so heading down to the local Walmart to pick up a replacement isn’t an option. To get a replacement that will work you will either need to build a replacement, have a friend do it, or order a drawer box from a professional.

Custom made cheap replacement cabinet drawers can be made in your choice of material, using either dovetail joints or dowel joints, in exactly the size you need.  A replacement drawer box measuring 18” wide by 20” deep by 4” high costs less than $30 dollars from Drawer Connection.

DIY Kitchen Drawer Replacement

Step 1. – Remove the broken drawer out of the cabinetry and put it on a table.  Take the drawer front off by removing the screws that hold it in place.

Step 2. – Flip the drawer over and remove the metal runners from the sides of the drawer.  If the bottom of the drawer falls out, just set it aside.

Step 3. – Tap on all the sides of the drawer to separate it into the 5 sections that make up a drawer, the 2 sides, front, back, and bottom.

Step 4. – Measure the sections of your drawer and use your table saw to rip new replacement sections.  You’ll need to match the lengths and widths of all the the sections.  The front, back, sides, and bottom need to be exact so the runners can be replaced and the drawer will fit correctly.

Step 5. – Using a 1/4 inch dado blade for your table saw prepare your table saw by setting the bland and fence to 1/4 inch.  Run the front, back, and sides through the saw to create a channel in each of the pieces.

Step 6. – Set all four of your sections together, as if they were already put together.  The side pieces should sit on the sides of the front and back sections.  The channel from step 5 should all sit at the bottom of the drawer at the same height.  Measure the inside of the width and length of the drawer and add 1/2 inch to each measurement.  Cut a section of 1/4 plywood to those measurements to be the bottom of your drawer.

Step 7. – Get some wood glue and run a bead where the drawer bottom will sit.  Set the bottom into the channel made for it ensuring there’s a nice coating of wood glue.  Use clamps to hold all of the sections together until the glue dries.  It’s a good idea to wipe off any excess glue at this stage.

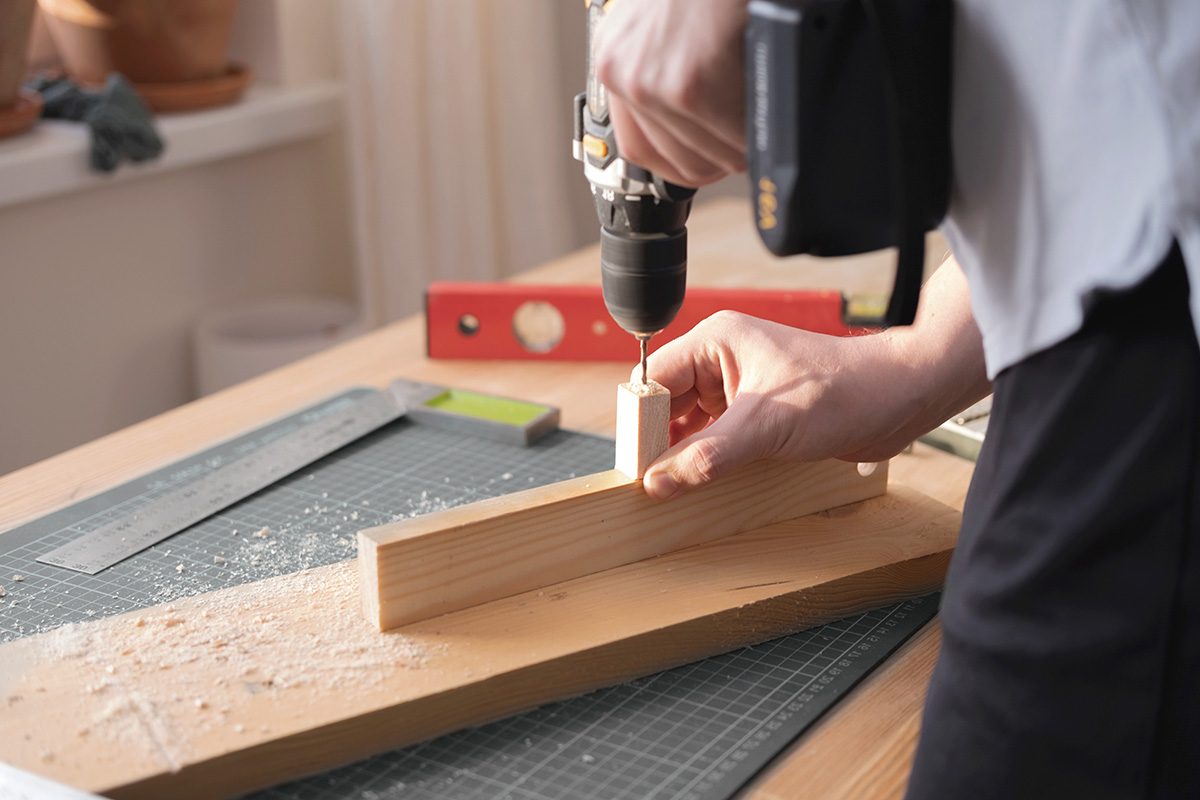
Step 8. – Drill holes for the drawer front screws to go through that are 3/16ths thick.  Using screws that are 1 1/4″ attach the front back to the drawer box.  Reattach the metal runners on the drawer and screw them into lace using 3/4 screws.  Set your DIY drawer into place back in the cabinetry and you’re done.d

3. Buying Drawer Slides To Match

The next step is making sure you have drawer slides that match your drawer box depth. You can choose from inexpensive roller slides to ball bearing slides that have soft close and smooth opening features. Most homeowners prefer buying the bottom-mount style drawer slides as they have a piece which wraps around the lower edges of the drawer box and makes for easier installation. There are cases where old hardware from the slides is still intact and can be reused, but many homeowners prefer starting fresh when repairing their cabinet drawers.

4. Prepping The Work Area

Depending on why the drawer broke, and how quick and dirty the repairs where you might have very little work, or a lot of work to do here. If there is any broken wood or hardware it should be removed and replaced. This can mean any glue that was used as a band-aid to hold the drawer front on the face of the cabinets, or it can mean removing and replacing broken or splintered wood inside your cabinets to have a solid area to secure your new drawer.  For glues you can try heating the adhesive up with a blow dryer or you can simply use a scraper to work the glue off and then sand & repaint the area.

5. Installing The New Drawer Box

Once your drawer box arrives, you will want to wait to attach the drawer front until the drawer box is installed and sliding back and forth correctly.  It can be a bit tricky to align the drawer front right, using double-sided tape to tack the pieces together saves time and effort. When installing the drawer ensure that the gaps on the top, bottom, and sides are equal. Once you are sure the box is installed right you can use at least 2 screws to secure the drawer front to the drawer box, from the inside of the drawer.

Buy Replacement Kitchen Drawers @ Drawer Connection

Buy cheap replacement kitchen drawers at Drawer Connection.  You can also shop for replacement dovetail drawer boxes and dowel drawer boxes on Drawer Connection’s site.

Knobs vs. Pulls: How To Choose Which One I Should Use

If you are searching for “knobs vs pulls“, “knobs or pulls“, “knobs or pulls on upper cabinets” or “should I use knobs or pulls on kitchen cabinets“; This post should help answer your question!

While it might seem like small detail, the details matter for well designed kitchens.  Not only will the choice of hardware affect the look of your kitchen, one choice may be more ergonomic.

The Kitchen Is A Gathering Place

Your kitchen is the main part of the home and many people consider it the most vital part of a house. You probably start your day off with coffee or a quick meal in the kitchen with your family. Everyone seems to gather together to socialize in the kitchen and it is where your meals are cooked and eaten together. Kitchens are a bonding area of your home. Whenever you, your family or guests are attracted to your kitchen and they want to spend time in it, you know your kitchen is a success.

Having a great looking and functioning kitchen is well worth the investment in the health and happiness of your family, so that means that all the little details do matter. Whenever you are designing your kitchen, you will normally start with the appliances and cabinets and from there everything is personalized with pulls, knobs, corbels or aprons. There is a lot of hardware to consider and often times the smallest will make a big impact.

Importance of Kitchen Cabinet Pulls and knobs

A small detail in your kitchen will be the knobs and pulls that are on your drawers and cabinets. The hardware that you pick out shouldn’t be something that you forget in the process of updating or remodeling. Cabinet pulls and knobs aren’t always considered like they should be, but the style that you pick can really impact the feel of your kitchen space. The hardware is just as important as your cabinets.

Shape, Style, Finishes

When you begin to shop around for your pulls and knobs, you will certainly found out that there is a huge selection of shapes, styles and finishes. For instance, modern styled pulls will pair well with cabinets that are in a modern kitchen that give sleek essence of elegance in the space. If you are wanting to have an old world feel, then using antique styled knobs could be what you are needing to compliment the décor. It could be a bit overwhelming when you are coming to the topic of knobs versus pulls, but is a choice that will deserve your time and consideration.

After you have selected new cabinets as well as appliances for the kitchen, the last thing that you want have to do is deal with the hardware, which is why many people don’t think too much about pulls and knobs. Most people also know that their kitchen space needs to be updated, but they don’t want to throw thousands of dollars into a remodeling project. Luckily, just swapping out the pulls and knobs can make a big difference in how your kitchen looks and you will spend only a fraction of the cost that comes with a renovation.

Knob vs. Pull Costs

The cost of knobs and pulls will vary, depending on which option you go with. Knobs can start at a couple of dollars for one but if you choose a high end option like a knob that happens to be made of unique Swarovski crystal, it could hundreds of dollars.

Pulls are normally more expensive than a knob because they are much larger, but just like knobs there are a variety of prices that will depend it on the option picked. Normal kitchen cabinet pulls start a couple of dollars but if you are looking for embellished antique bronze options then you are looking at hundreds of dollars. Cup pulls are going to be more expensive to start with, but the less expensive options start at about $7.

Guidelines for Choosing Kitchen Cabinet Knobs vs. Pulls

Knobs vs Pulls How To Choose

It is vital that you pick cabinet hardware that will compliment your kitchen décor and accentuate the features. Normally people just want the hardware to coordinate with the handles on the appliances. The colors need to work well together and the finishes shouldn’t clash at all. Different shapes can make your kitchen feel cluttered and you should use your personal preferences and functionality to choose if you should go with a pull or a knob, but there are a few guidelines that you need to follow that will work with your cabinet style.

Knobs or Pulls for Shaker Style Cabinets?

This is the most common style of cabinet and it will give you flexibility with the design and they work with bin/cup pulls or knobs. Shakers are known for being simple and having clean lines, so simple hardware such as round knobs are often used.

Traditional steel or nickel knobs or pulls are very common as well as ceramic of vintage glass knobs. Vintage pulls that have exposed screws give an industrial or classic feel to a new kitchen that has these cabinets. Tubular pulls which may be long or short will often modernize traditional kitchens which these types of cabinet. Flat bar pulls will give it a contemporary edge while a wire pull will make it more traditional. Footed or arched bar pulls will give it a classic look to a shaker cabinet.

Knobs or Pulls for Flat Paneled Cabinets?

Most often these cabinets are seen in contemporary or modern kitchens. They embrace minimal embellishments to focus on natural materials. Using subtle hardware pieces are best like stainless steel bar pulls. You will often see extended, long versions on drawers or doors.

If you are one to prefer square edges, you can pick a flat bar pull. A recessed pull will offer you functional options that work well for kitchens with a lot of traffic. If you are looking for a minimalist look, then you may think about discreet tab pulls for flat styled cabinets.

Knobs or Pulls for Inset Cabinets?

An inset cabinet will give you inset, flush doors that have an edge detail that shows craftsmanship. Most inset cabinets will have exposed hinges, which will give you something to consider as many people prefer pulls or knobs to match the hinges. Both knobs and pulls are paired with an inset cabinet.

Knobs or Pulls for Distressed Cabinets?

Using rustic hardware will pair nicely with a distressed cabinet look. You should consider adding back plates for unique Mediterranean style or antique or rustic knobs or bronzed pulls.

Knobs or Pulls for Louvered Cabinets?

Both knobs and pulls will work with a louvered cabinet, but knobs are quite common. You should keep in mind that a louvered cabinet will have more details than a solid, plain cabinet. There is more to look at, so they will require more attention, which is why people pick classic or simple pulls and knobs to compliment the cabinets.

Knobs or Pulls for Beadboard Cabinets?

These cabinets will give your kitchen a cottage chic type of look, which goes nicely with cup pulls or knobs. Similar to louvered cabinets there is more details to look at, so simple hardware will work best. Adding elaborate hardware would be too distracting and take from the character of the beadboard.

Choose Knobs or Pulls Based On Your Personal Style

You should really pick your hardware based on your personal preferences, goals for functionality and kitchen style. If you have a concern about your resale value, and you recognize that most popular hardware finishes are bronze, satin, and nickel. There are also aren’t hard set rules that you need to follow when it comes to adding final details to the kitchen and most people just pick a combination of pulls and knobs. If you aren’t sure about what you should pick, it is best to check out the pros and cons.

Cabinet Knobs vs. Pulls – Pros and Cons

The choice between knobs vs. pulls isn’t that easy as both have positives and negatives. You should keep in mind that you will be using them every day. Whatever you pick, should feel natural in your hand and flow with the décor of the kitchen. You need to consider the look you are wanting, your budget, the décor and style of the kitchen, ease of use, weight of drawers and ease of cleaning as well as other things.

Everything you need to know about knobs

Cabinet-Knobs

Knobs are a basic kitchen hardware, and they are easy to replace on your own. They are often installed using a single screw. Knobs will come in different sizes and shapes and are made from various materials like ceramic, marble, glass, crystal, zinc, stone, brass, stainless steel and more. There are common shapes such as birdcage, round and square. There are also plenty of novelty pulls that you can pick from, so you are able to add an element of your personality to the kitchen.

Pros for picking Knobs:

  • You have many options. You will have almost endless options for knobs. You can pick something luxurious to accent an elegant, formal kitchen of something economical. Small or large, wood, or colorful, square or round, there will be an option. You can get detailed and personal when you pick a knob for your kitchen.
  • Knobs are a bit cheaper. You can purchase a knob for lower than a pull. High end knobs will cost a bit more, but if you are looking for economical, then you will find plenty of inexpensive knobs.
  • Knobs are really easy to install. You can install them in minutes and they will transform your kitchen. They are put on using a single screw, so you just have to unscrew the old knob and put the new one on.
  • Round knobs will never be crooked. Knows that are attached by screws, and screws can get lose over time. If you pick a round knob, then it will always be centered. Novelty knobs, knobs that aren’t round, square knobs can lose the center and look like they are unbalanced when the screw becomes loose. However, it isn’t a hard problem to fix, it just can be annoying to see them in our kitchen which is why many people stick to round knobs. There are knob brands that have brads at the base that will stick to the cabinet to prevent it from rotating.

Cons for picking knobs:

  • They can be hard to clean. If you pick a novelty knob, or highly embellished knobs they could be hard to clean. Messy hands, grease splatters, and occasional spills will happen. But adding personalized knobs will add flair to the kitchen, but if you aren’t able to keep them clean easily, then you may replace them sooner than later.
  • Knobs are hard to grab. Whenever you compare a knob to pulls, a knob is harder to grab on to and pull on. If a person has a disability or arthritis, then it can be an issue.
  • Some knobs can catch on clothing. Although a pull that extends can catch clothing, knobs can do it too. Depending on the location, shape and size of the knob, it can catch on clothing and become annoying.

Everything to know about Pulls

Cabinet-Pulls

Pulls are easy to install and they usually take more than 1 screw. Most pulls will require 2 screws and similar to knobs, there are multiple options. The most common pulls will include:

  • Birdcage
  • Ring pulls
  • Bar pulls
  • Bail/drop handle pull
  • Arch pulls
  • Bin pulls/ cup pulls

There are a lot of lengths available, but the common one is 3 to 4 inches. Length is vital because if it is too small, the cabinet will be overpowering. This can be a problem with heavy appliance doors. If you are using a small pull, it could warp over time. If it is too large, it can be overwhelming. You can mark your cabinets with painter’s tape to find the length you want.

Should I Use Knobs Or Pulls On Kitchen Cabinets?

Which is better a pull or a knob? There isn’t a definite answer. It is based on your personal preference and the elements of your kitchen. You should give extra thought to function and make the choice for your needs. You will often find that a combination of pulls and knobs work best, so there isn’t a lack of options and variety to pick from. And if you need quality drawer boxes for your new kitchen or replacement drawer boxes Drawer Connection has everything you need! You can buy replacement knobs and pulls at MKRemodeling.com.

Best Tools and Techniques for Finishing Unfinished Cabinets

When it comes to finishing cabinets, whether it be with stain, paint, urethane, oil or another product, it can be simple and fun. Applying a finish to cabinets does not require all types of experience or tools either, just a few techniques and tricks to assist with achieving the factory finish look you want. The great discounts you can get from purchasing unfinished cabinetry provides enough reason to do the finishing on your own. If you prefer staining or painting, or simply varnishing an unfinished cabinet, below are basic things that you should know prior to starting to achieve a perfect finish.

Surface Preparation and Sanding

One of the largest mistakes those new to finishing make, is lack of preparation for the cabinet surface, followed by neglecting the sanding process between finishing coats. With unfinished wall cabinets or base cabinets, manufactures handle the majority of sanding. Although, another light sand using a fine grit sandpaper should be done. You should use at most a 200-grit sandpaper, but a 400 grit is best for achieving a smooth finish.

When sanding, there are two main factors to remember. First, you should always sand towards the grain. The second, apply gentle pressure to avoid damaging veneer. This means avoid using power sanders, as the back and forth, rotation motions will result in scratches in the wood grain.

Between coats, the sanding is more significant that an initial sanding. The reason for this is, bubbles occur when applying the finish caused by tiny debris and dust particles adhering to the cabinet surface. This leaves coats with an unwanted rough texture. Using a soft motion with 400 girt sandpaper, or a steel wool will open these bubbles to prevent the rough texture.

Remember, Less Is More

When working with finishing techniques, a key factor to remember is that, less is more. When applying the initial coat or two, you may think of applying a thicker coat, but this is bad. Doing this will result in the finish soaking in the wood, providing a very patchy appearance. Although, finishing coats come with a set of common problems:

  • A heavy finish often produces more bubbles compared to thin coats.
  • Thicker coats will take much longer to dry between applications, meaning extended exposure to dust and debris.
  • A thicker coat will drip, run, or have more flaws.

When you’re trying for a perfect glossy urethane or paint finish, aim for a three to five coat application instead of two thicker coats.

Which Tools are Best?

A great thing about cabinet finishing, is that no complex or expensive tools are required. The basics you will need include cloths, brushes, sandpaper, and rags for cleaning up messes. When using water based finishes, you will need water, and mineral spirits or paint thinner for an oil based finish.

Determining the best brush to use, and when to use cloths? Below are the best methods for applying finishes:

  • For stains, use a cloth for applying. Traditional stains are thin and runny, meaning an even coat will be difficult to get with a brush. A gel stain will be too thick for applying with a brush, as it causes the stain to be pushed instead of rubbed into the grain.
  • Polyurethane, urethane, varnish or other oil based clear coats may be applied using a cloth or brush. Although, cloths are often the preferred approach as it allows for a thinner and even coat.
  • For oil and latex paint, use a brush. Soft brushes are better for thin latex paints, while oil paints do best with stiffer brushes.
  • Oils, such as tung oil or teak oil need to be applied with a cloth, as these are rather thin.
  • Unless using paint, a clean lint free cloth is often best for applications. Old t-shirts or cheesecloths work well. When going old t-shirt routes, cut them into pieces and make multiple rags, place them in a washing machine and remove any fuzzy particles. This could take two or more washes.

Benefit Of DIY Cabinet Finishing

By finishing cabinets on your own, you not only save money, you create memories, and its simple to do. These techniques and tips can provide the perfect showroom appearance to your cabinets, no matter the desired finish. Now, you can snag a great deal the next time you find an unfinished kitchen cabinet without hesitating. Don’t be afraid to try DIY finishing your cabinet doors or drawer boxes!

Kitchen Cabinet Parts Terminology

Kitchen Cabinet Parts Terminology

If you are searching for “parts of a cabinet” or “kitchen cabinet parts terminology” and what words like Inset, frameless, overlay, stiles and rails mean? If so, DC Drawers can help!

Kitchen Cabinet Parts Terminology & What They Mean

We work directly in conjunction with cabinet door manufacturers and have had the experience of learning a little more about cabinet parts and terminology used in the industry.

Kitchen-Cabinet-Parts-Diagram

Rail:

Cabinet Rail

The piece of the cabinet’s frame structure located at the top and bottom of the door.

Stile:

Cabinet Stile

The piece of the cabinet’s frame structure located on the left and right of the door.

Framing Bead:

The part of the cabinet door that is cut in front.

Framing Edge:

The part of the door that has a decorative design in the edges of the door.

Drawer Box

Drawer Boxes

The drawer box is one of the main components of any kitchen cabinet. The drawer in a kitchen cabinet is used more often than the cabinet doors themselves. You can easily replace drawer boxes by purchasing them online or at a local cabinet shop.

Cabinet Face Frame

The cabinet face frame is the front of the cabinet behind the door and drawer. It is typically make using solid wood but cheap cabinetry often uses staples for attaching the face frame.

Cabinet Door Hinges

Cabinet Hinges

Cabinet door hinges are also a very important part of a cabinet. They hold the cabinet door up and are opened and closed thousands of times throughout their lifetime. It is always wise to buy high quality hinges due to the rigorous wear they go through. You can find replacement cabinet hinges at homedepot.com and places like that online.

Cabinet Doors & Drawer Fronts

Cabinet-Door

Drawer-Front

The cabinet door you choose is important because these will be the first thing you see when you walk into your kitchen. However, you can easily buy replacement cabinet doors and drawer fronts online or at your local cabinetry shop.

Shelves

Strength should be your primary focus when it comes to cabinet shelves. Your shelves hold weight for long periods of time and should be built out of quality hard wood for the highest durability. Some choose to go with cabinet organizers or slide out shelves for easier access.

Drawer Slides

Drawer slides need to be high quality due to the rigorous wear and tear they go through when being opened and closed thousands of times throughout the years. Consumers can choose either traditional drawer slides or drawers with power outlet options called drawer outlet kits.

Panel Raise Profile:

Raised-Panel-Cabinets

The part of the frame’s door that is given a cut on the raised panel, enhancing the fact that the panel is separated from the frame itself. This panel may also be flat. When the panel has been raised it will resemble the pictures of the door above. It shows that where the frame and panel come together, the panel has been elevated, and stands out from the frame. A flat panel however, is like it sounds, flat, and straight across.

Frame or Frameless:

Frameless Cabinet Doors

The cabinet’s frame can be either way, framed or frameless. Making the cabinet frameless will make it have more accessibility, ‘All access’. This type of structure is constructed without a face frame, having a thicker box structure, making it more stable.

It is significant that you know what the difference between a full and a partial overlay is in cabinets, and also, what inset cabinets are. On a full overlay cabinet or drawers, the doors or drawers will cover the face frame completely. With a partial overlay, the cabinets are going to show some of the frame still. An inset feature of a cabinet is where the doors and /or drawers fit inside (behind) the face frame opening of the cabinet.

Understanding The Different Parts Of A Cabinet

By understanding what the different parts of cabinets, as well as your drawer box choices and the types of door framing you can choose from, will will help extremely in deciding the way you are going to want your kitchen and /or bathroom appearance to be.

Knowing all of this a head of time can bring greater end results! After all, the process of cabinet making is not as confusing or befuddling as some may think. Of course, if you are a cabinet professional, you will most certainly want to learn as much about it as you can, and hopefully, this article has provided you with a little bit of knowledge into the world of making cabinets. I know I have learned a lot that I did not know before from it.

Thank you for reading “Kitchen Cabinet Parts Terminology“! Stay tuned for more from the expert drawer box manufacturers at DCDrawers.com

What Is Melamine Wood?

If you’re searching “what is melamine wood?” or “is melamine waterproof?” you might be looking for new cabinets or melamine cabinet drawers, or you may be looking at plates, flooring, or even dry erase boards.  Melamine is a laminate product that is a common hard resin overlay which is heat applied to plywood or MDF.  It is a highly durable thermosetting plastic which starts as an organic compound which is combined with formaldehyde.

Laminate vs. Melamine

Melamine is type of laminate, yet not all laminates are made from melamine. A laminate is the description of a product where a layer, or laminate, is applied over a substrate such as plywood or MDF.  Melamine laminates are constructed by molding a formaldehyde/melamine combination into a sheet of durable plastic.  Melamine is fabricated through a process of applying a pressure of about 300 to 500 lbs per square inch.  This pressure makes melamine a lower pressure laminate, or LPL.  Formica is another type of laminate which is formed using much higher pressure, a whopping 1,400 lbs per square inch.

Melamine Benefits For Building

Melamine when installed correctly is a long lasting, inexpensive, and durable option.  While melamine is waterproof if it is installed poorly water may get into the inner wood, causing the melamine to warp.  The durability of melamine makes it a favorite, but if installed poorly there is a chance of it chipping.

  • Wide Selection – Melamine is produced in an incredibly wide variety of finishes and colors.
  • Great Durability – Melamine is waterproof, shatter and scratch resistant.
  • Easy On Budget – Melamine covers less expensive wood products like MDF or plywood.

What Is Made From Melamine?

Melamine is widely used product in a number of industries.  It is used in kitchen cabinetry, display counters, office furniture, dry erase boards, and even flatware like dishes and bowls.  Melamine has become a popular building material as it gives otherwise lower quality materials an attractive and durable finish.  While most of us would prefer solid wood cabinetry Melamine offers a much more budget friendly option which is lightweight, convenient, and a cost effective decision.

How Melamine Is Made

A special type of craft paper which does not get soggy or tear even when it is saturated is soaked in a resin called phenol.  The resin absorbs into the paper and then goes into a drying oven to cure.  The paper is then winded into a roll.  At this point solid color or decorative layer melamine is separated into two process lines.  Solid color melamine is then coated with additional resin while melamine which will have printed designs is combined with an overlay of melamine.

Under Pressure & Heat

Once these products are ready they are sent to a press.  As the laminate sections are laid in the press a metal sheet is set between them to prevent the layers from sticking to each other. Under high heat and pressure the sheets of decorative laminate and the saturated melamine craft paper are made into laminated sheets of melamine.  The metal sheets that are set in as the layers are stacked before pressing may contain designs of wood grain or stone texturing.  After the press the laminate layers are completely cured.  The finishing line trims and sands the sheets to ensure proper adhesion when combined with the MDF or plywood substrates.

Compound laminates are made from stacking thick sections of black laminate along with craft paper and 2 decorative layers. Compound laminates are so thick that they are used without the addition of plywood or MDF to provide structural support.

Melamine Cabinet Drawers

If you are a homeowner or cabinetry company looking for melamine cabinet drawers, Drawer Connection is here to help!  We off affordable melamine cabinet drawers, high quality, and fast turnarounds.  Let our shop take care of the drawer boxes while you focus on the rest of the cabinetry and doing installs.  Homeowners are also welcome to place orders for replacement melamine cabinet drawers.

Shop: Melamine Dovetail Cabinet Drawers

Shop: Melamine Dowel Cabinet Drawers